Your Kids First Mountain Bike: Guide for Parents
- Wrench & Roll
- Oct 23, 2025
- 8 min read


Getting a child their first mountain bike is a special moment. It is a mix of freedom, adventure, and a little bit of mud on the shoes. The goal is simple. You want a bike that fits well, feels fun, and lets your kid build skills without scary surprises. In this guide you will learn how to choose the right size, what parts matter most, how to set everything up for comfort and safety, and how to plan those first rides so the love for biking lasts for years.
What matters most for a first kids mountain bike
Think of three pillars. Fit. Weight. Confidence.
Fit means the bike matches your child’s body right now, with a little room to grow without becoming clumsy or hard to control.
Weight is the hidden boss. Lighter bikes are easier to start, stop, and steer. A heavy bike steals energy and confidence.
Confidence is the feeling that the bike listens. Brakes respond. Gears shift smoothly. The saddle feels right. The trail feels friendly.
Get these three right and everything else becomes easier.
How to pick the right size without guesswork
You can use height, inseam, and a simple stand over test.
Inseam check
Have your child stand barefoot with feet slightly apart. Measure from the floor to the crotch. This is the inseam. The bike should allow stand over clearance of a few centimeters so they can step off safely without bumping the top tube.
Saddle height
With your child on the saddle, place the balls of both feet on the ground for early learning rides. As confidence grows you can raise the saddle so there is a slight knee bend at the bottom of the pedal stroke. Comfort first, then efficiency.
Reach check
Have your child hold the grips. Elbows should have a soft bend, not locked out. If they must stretch to reach the bars, the bike is too long. If their knees bump the bars during turns, it is too short.
Wheel sizes for kids and what they mean
You will see common sizes like sixteen, twenty, and twenty four inches. Here is how to think about them.
Sixteen inch
Great for young riders who are moving up from a balance bike or a small sidewalk bike. Short rides on smooth paths and gentle dirt. Keep it simple.
Twenty inch
The first real step into mountain fun. These bikes can have gears and better brakes. Perfect for green and easy blue level trails, park paths, and family rides.
Twenty four inch
Now we are rolling. More control, more room to grow, and better components. Many kids feel ready for longer trail loops at this size, with real climbing and smooth descents.
Remember that the right size is the one your child can control today. A bike that is too big may look like it will last longer, but it often kills confidence and fun.
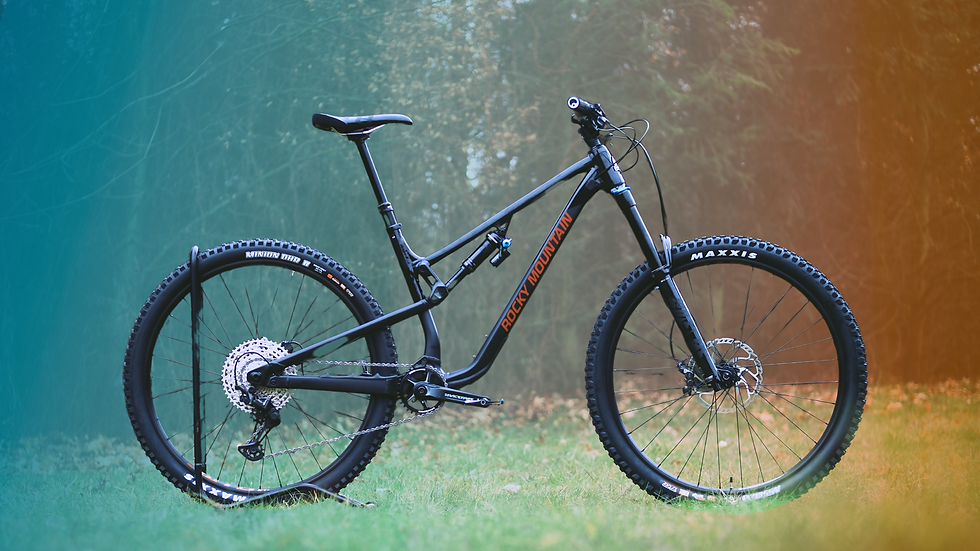
Frame and fork choices made simple
For a first kids mountain bike you usually want a rigid fork or a basic suspension fork that actually moves under a child’s weight. Many cheap forks feel stiff and add weight without helping. Test by having your child press down on the bars. If the fork does not move, it is just extra weight. A quality rigid fork with wide tires can be a better choice than a heavy fork that does not work.
Look for a frame with a low stand over height and a short reach so the child can steer easily. Aluminum frames are common and light. Steel can be comfy but sometimes heavier. Carbon is rare and not needed for a first bike.
Brakes that build trust
Reliable braking is non negotiable. Two main types exist for kids bikes. Rim brakes and disc brakes. Well set up rim brakes can work fine on flatter paths. Disc brakes give better control in wet weather and on real trails. The key is lever reach. Make sure brake levers can be adjusted so small hands can reach them comfortably. Ask for a reach adjust screw on the lever. Test it. Your child should be able to cover the brakes with the first finger while keeping a relaxed grip.
Gears that shift smoothly
Simple is best. A single chainring up front keeps things easy. An eight to ten speed cassette in the back is plenty. Smooth shifting builds confidence on climbs. If shifts feel clunky, check cable tension and make sure the shifter is not too stiff for small thumbs. Teach a simple habit. Ease the pedal pressure slightly during a shift. That tiny skill makes the bike feel magic.
Tires that do real work
Tires define grip and comfort. For family trails and park paths, choose a medium tread with a rounded profile. Wide tires at lower pressure give comfort and control. Use the sidewall pressure range as a guide, then fine tune. If the ride feels harsh and the tire skips over small bumps, lower the pressure a little. If the tire feels squishy and rolls side to side in turns, add a little air. Make small changes and test.
Contact points that make kids smile
Small hands and small bodies need small touch points.
Grips
Choose a slimmer grip so little hands can wrap around fully. This helps with braking and steering.
Saddle
A slightly wider kids saddle with soft padding works well for early rides. Check tilt. Start level. If your child slides forward, raise the nose a tiny bit. If they feel pressure, lower it a bit.
Pedals
Flat pedals with a grippy surface are perfect for learning. Use shoes with a firm sole. Avoid slippery plastics.
The first setup at home
Give the bike a friendly welcome with a simple tune.
Inflate tires within the recommended range for your child’s weight.
Set saddle height so both feet can touch the ground at stops during the first rides.
Adjust brake lever reach for small hands.
Check that the chain is clean and lightly oiled.
Make sure all bolts are snug. Bars, stem, seatpost, wheels, and pedals.
Make it a fun ritual. Let the child help with the pump and a soft cloth. Ownership grows confidence.
Safety gear that kids actually want to wear
A comfortable helmet is a must. The right fit is snug but not tight. The helmet should sit level, not tilted back. Use the fit dial if there is one, then adjust straps so they form a V around each ear and the buckle sits under the chin with a finger of space. Add simple gloves for grip and a little protection. If you ride in cooler seasons, get a thin beanie for under the helmet. In sunny weather, use light layers and bright colors.
A parent friendly pre ride checklist
Use this short list every time. It takes two minutes and prevents most surprises.
Squeeze both brakes. Firm and even.
Spin the wheels. No rubbing on the brakes.
Lift the front of the bike and drop it gently. Listen for loose parts.
Shift through all gears on the stand. Smooth in both directions.
Check tire pressure by feel. Firm with a little give.
Quick release or axle tight. Bars straight. Saddle tight.
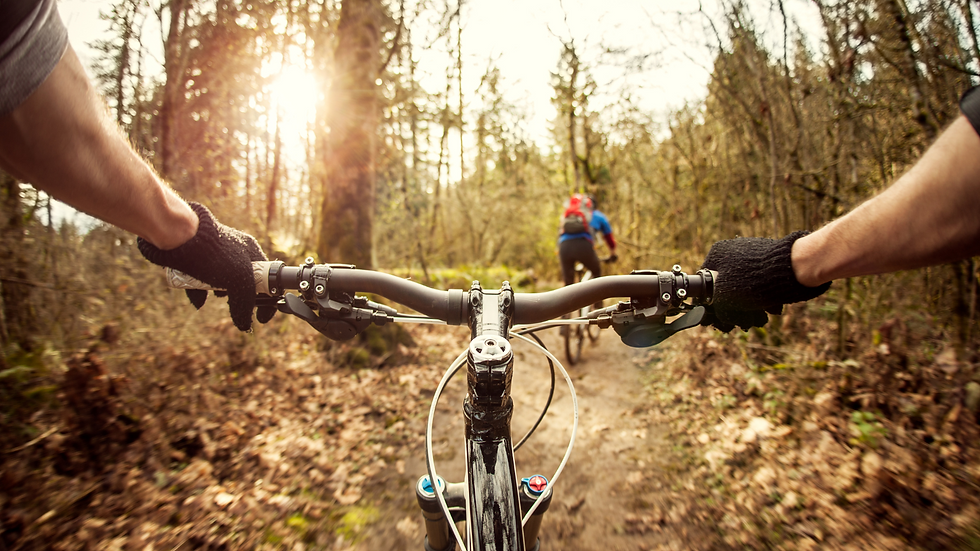
Planning the first trail rides
Start with short and sweet rides that end on a win. Choose a flat loop with a mix of smooth dirt and easy turns. Keep total time short enough that your child wants more the next time. Bring water and a small snack. Stop often. Celebrate small skills like using both brakes, looking ahead through a turn, or standing up on the pedals over a bumpy patch.
A great first month plan could look like this.
Week one
Two short rides on smooth dirt paths. Practice braking and starting from a stop.
Week two
Add gentle climbs and smooth descents. Practice shifting up before a climb and down before stopping.
Week three
Introduce small roots or tiny rollers. Teach the ready position. Pedals level. Hips back a little. Elbows soft. Eyes forward.
Week four
Try a longer loop with a few easy turns in a row. Practice looking through the turn and keeping eyes on the exit.
Keep the mood light. End each ride with something fun. A favorite snack. A high five. A photo of the muddy grin.
Simple skill games that teach without lectures
Children learn best through play. Try these tiny games.
Cone slalomSet three water bottles or sticks in a row and weave through them at walking speed.
Slow raceWho can ride the slowest without putting a foot down. Balance improves fast.
Feather touch brakingRide next to a line on the ground and practice slowing to a stop with the front brake only, then the rear only, then both together. Learn the feel, not the fear.
Ready position over bumpsFind a grassy strip with small bumps and practice standing with pedals level and light hands.
How to keep motivation high
Spark joy first. Skills come naturally. Let your child choose the route sometimes. Invite a friend if that helps. Mix in a destination ride, like a loop that ends at a park or a picnic spot. Take short videos of progress and show them later. Celebrate progress, not speed. The point is to fall in love with riding.
When upgrades actually help
You do not need fancy parts to start. A few well chosen upgrades can make a big difference without breaking the budget.
Lighter tires or quality tubes can reduce rolling resistance and make climbing easier.
A smoother cassette and a quality chain improve shifting and reduce noise.
Real kids brake levers with reach adjust improve control.
A basic suspension fork that truly moves under a child’s weight can help on rougher trails. If it does not move, skip it and keep the bike light.
Always fix fit and weight before chasing complex parts.
Maintenance that parents can handle
Keep the routine simple and consistent.
Wipe the chain with a cloth after wet or dusty rides. Add a small drop of bike lube and wipe off the extra.
Check tire pressure once a week.
Check that the wheels spin straight and that nothing rubs.
Listen for new sounds during each ride. A small click or squeak is a friendly reminder to check bolts and clean.
If anything feels off, get a quick check at a trusted shop. Early fixes are cheap and keep confidence high.
Trail etiquette for kids
Good habits start early and make everyone safer.
Stay on the trail and avoid skidding.
Yield to hikers and uphill riders. Slow down, smile, and say hello.
Announce when passing with a friendly voice.
Stop and move to the side if you need a break.
Pack out every wrapper. Leave the place nicer than you found it.
A calm approach to falls and fears
Every rider has tiny tumbles. Keep calm. Check for any real pain, then talk through what happened in simple terms. Praise the attempt, not just the success. If fear shows up, step back to an easier section and end with a smooth lap. Confidence is a bank account. Keep making deposits with small wins.
A quick buyer checklist to take to the shop
Bring this with you and you will feel like a pro.
The child can stand over the frame with room to spare.
Hands reach the brake levers with a soft bend in the elbows.
Saddle height allows both feet to touch for early rides.
The bike lifts easily with one hand. If it feels like a brick, look for a lighter one.
Tires have a sensible tread for your usual paths.
Shifts are smooth. Brakes are firm but easy to pull.
Your child is smiling on the test ride.
Final thoughts
A first mountain bike is not just a purchase. It is a doorway to fresh air, family time, and the thrill of learning something new. Focus on fit, low weight, and a setup that makes your child feel in control. Start with gentle rides, add playful skill games, and keep maintenance simple. The goal is joy that grows into a lifelong habit.
If you remember only one thing, remember this. The best bike is the one your child is excited to ride again tomorrow.

Comments