How to Fix Bike Brakes Before They Scare You
- Olle Spegel
- Sep 15, 2025
- 3 min read

Picture this: you’re cruising down Grandad Bluff Road, picking up speed, and when you squeeze the brakes—nothing happens right away. It’s every rider’s nightmare. The good news? Most brake problems are easy to fix if you catch them early. Whether you’re riding to campus, hitting the Driftless trails, or commuting downtown, knowing how to fix bike brakes is one of the most useful skills a cyclist can learn.
Why Brakes Fail (and How to Spot It Early)
Brakes don’t suddenly stop working out of nowhere. They usually give you plenty of warning—if you know what to look for.
Squeaking or squealing: Pads may be dirty, misaligned, or glazed.
Weak stopping power: Pads are worn down, or cables have stretched.
Levers pull too far: Your cables need tightening, or in hydraulic systems, you may need a fluid top-up or bleed.
Uneven braking: One pad is hitting the rim/rotor before the other.
In La Crosse, with our mix of steep bluffs and wet fall leaves, weak brakes aren’t just annoying—they’re dangerous.
Step 1: Inspect the Pads
Pads are the first thing to wear out.
For rim brakes, look at the rubber pads—if they’re smooth or nearly flush with the wear line, replace them.
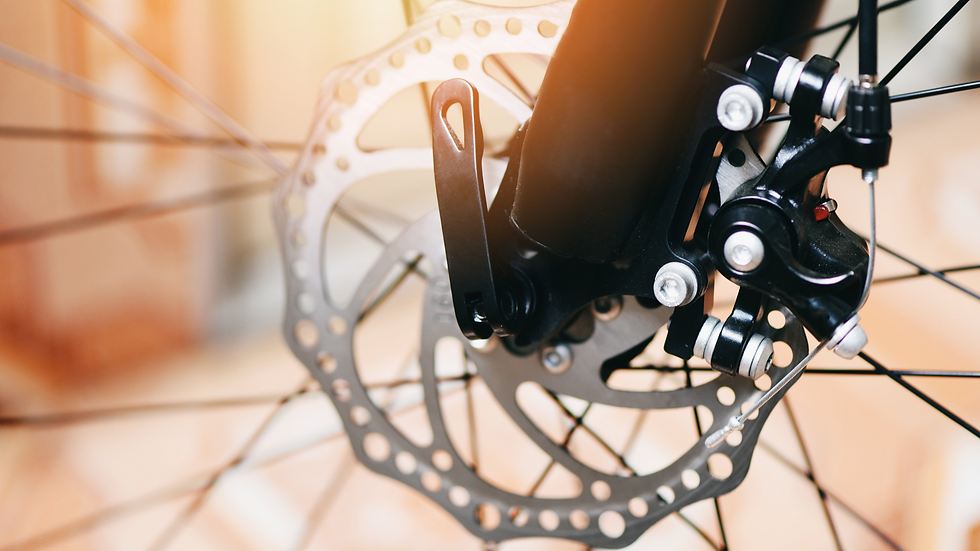
For disc brakes, check pad thickness. If there’s less than 1–2 mm left, it’s time for new ones.
Pads also collect grit from wet rides. A quick sanding or cleaning with rubbing alcohol can restore performance.
Step 2: Check the Cables or Hydraulic Fluid
Cable Brakes: Over time, cables stretch. Use the barrel adjuster near the brake lever to tighten them. If cables are frayed or rusted (common in Wisconsin winters), replace them.
Hydraulic Brakes: If your lever feels soft, you may need to bleed the system and add fresh fluid. This is trickier to DIY, but we handle it quickly in our service shop.
Step 3: Align and Center the Brakes
Brakes should hit evenly and release fully.
For rim brakes: Make sure the pads contact the rim squarely—not the tire or hanging off the edge. Adjust with a 5 mm Allen key.
For disc brakes: Loosen the caliper bolts slightly, squeeze the brake lever, then retighten. This centers the caliper automatically.
Step 4: Test Before You Ride
Once you’ve made adjustments, test your brakes in a safe spot.
Squeeze hard at low speed to ensure they engage smoothly.
Check that levers don’t bottom out.
Make sure wheels spin freely without rubbing.
Pro Tips for La Crosse Riders
Wet leaves + rim brakes = slick stopping. Clean rims after rainy or fall rides.
Store bikes inside in winter: Cold weather stiffens cables and dries hydraulic seals.
Check brakes weekly if you ride the bluffs or use your bike for daily commuting.
When DIY Isn’t Enough
Sometimes no amount of adjusting will fix the problem. If your pads are gone, your cables frayed, or your rotors bent, it’s time to call in backup. That’s where we come in.
We handle:
Brake pad replacement (rim and disc)
Cable replacement and adjustments
Hydraulic brake bleeding
Rotor truing and alignment
Bring your bike to Wrench & Roll Bikes in La Crosse for a brake check or tune-up. We’ll get your stopping power back so you can ride safely on city streets, campus routes, and Driftless trails.


Comments